Shopify Speed Tool & Seasonal Demand: Seller Prep Guide

This guide gives cross-border e-commerce sellers a practical framework for choosing a Shopify store speed optimization tool. You'll learn the key categories, evaluation criteria, common pitfalls, and actionable next steps to improve your store's performance and conversions in 2026.
Why Shopify Store Speed Optimization Tool Matters in 2026

In 2026, site speed is a competitive edge. Google's core web vitals remain a ranking factor, and mobile commerce dominates cross-border sales. A slow store can increase bounce rates by up to 38% (indicative data). For sellers, a fast store improves user experience, conversion rates, and SEO. Buyers expect near-instant loading; a one-second delay can reduce conversions by 7%.
Shopify's infrastructure is robust, but apps and themes can slow it down. A Shopify store speed optimization tool helps identify and fix performance bottlenecks. This guide gives you a practical framework to choose the right tool, avoid common mistakes, and take action.
- Speed impacts SEO rankings and ad costs.
- Mobile users expect sub-2-second load times.
- Speed tools help diagnose issues like render-blocking scripts and oversized images.
Key Categories of Shopify Store Speed Optimization Tools
Speed optimization tools for Shopify fall into several categories, each addressing different aspects of performance.
1. **Performance Testing & Monitoring**: These tools analyze your store's speed and provide scores. Examples include Google PageSpeed Insights, GTmetrix, and Shopify's built-in speed report. They are often free and give a baseline.
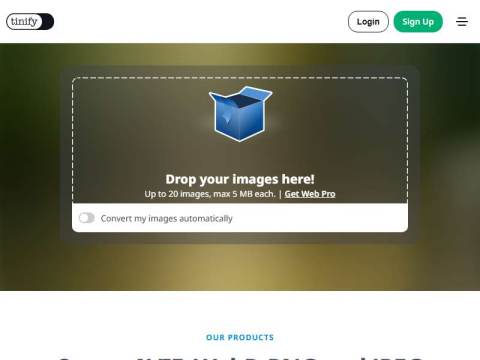
2. **Image Optimization**: Large images are a common culprit. Tools like TinyPNG, Crush.pics, or Shopify's built-in image compression help reduce file sizes without losing quality. Some are apps that auto-compress on upload.
3. **Code & Script Optimization**: These tools minify CSS/JS, defer loading, and remove unused code. Examples include NitroPack, Minifier, and certain theme builders with built-in optimization.
4. **CDN & Caching**: Content Delivery Networks (CDNs) like Cloudflare or BunnyCDN cache content across global servers, reducing latency. Some tools integrate CDN with caching and minification, like NitroPack or PageSpeed.
5. **Comprehensive Optimization Suites**: These combine multiple features: image compression, code minification, caching, and CDN. They are often subscription-based and provide a one-click solution. Examples: NitroPack, PageSpeed, and RocketCDN.
- Testing tools: PageSpeed Insights, GTmetrix, Shopify Speed Report
- Image tools: TinyPNG, Crush.pics, Squoosh
- Code tools: Minifier, Deferscript
- CDN/Caching: Cloudflare, BunnyCDN
- Suites: NitroPack, PageSpeed, RocketCDN
How to Evaluate Shopify Store Speed Optimization Tools
Choosing the right tool requires clear criteria. Here are key factors to consider, with indicative price ranges (subject to official updates).
**1. Features**: Does it cover your main bottleneck? If images are the issue, an image optimizer may suffice. If you need overall speed improvement, a suite is better. Check for features like lazy loading, caching, and CDN integration.
**2. Ease of Use**: Can you install and configure it without a developer? Some tools are plug-and-play; others require technical setup. For non-technical sellers, a user-friendly interface is crucial.
**3. Impact on Core Web Vitals**: Look for tools that specifically improve LCP (Largest Contentful Paint), CLS (Cumulative Layout Shift), and INP (Interaction to Next Paint). Ask for case studies or test on a staging site.
**4. Pricing**: Free tools exist (PageSpeed Insights) but are limited. Image optimizers often have free tiers with caps. Suites range from $10 to $50+ per month. Annual plans may offer discounts. Always check for hidden fees (e.g., overage charges).
**5. Compatibility**: Ensure the tool works with your Shopify theme and other apps. Some tools conflict with lazy-loading scripts or page builders. Test on a staging store first.
**6. Support & Updates**: Check if the tool is actively maintained and offers support. Look for reviews on the Shopify App Store and social media.
**Trade-offs**: Free tools are limited; cheap tools may lack features; expensive tools may be overkill for small stores. A suite might add extra HTTP requests if not configured well. Balance cost against expected revenue lift.
- Identify your main speed bottleneck first.
- Test tools on a staging store before committing.
- Read recent reviews and check update frequency.
- Consider the total cost, including any overage charges.
- Look for tools that offer a free trial or money-back guarantee.
Common Pitfalls When Dealing with Shopify Store Speed Optimization Tools
Sellers often make mistakes that hurt performance or waste money. Avoid these pitfalls:
**1. Over-optimizing with multiple tools**: Using several apps that do similar things can create conflicts and slow down your store. Stick to one comprehensive tool if possible.
**2. Ignoring theme and app bloat**: Speed tools can't fix a poorly coded theme or too many apps. Audit your apps and remove unused ones.
**3. Not measuring before and after**: Without baseline data, you can't know if the tool works. Use PageSpeed Insights before and after installation.
**4. Choosing based on price alone**: The cheapest option may lack critical features. Conversely, the most expensive isn't always the best. Focus on features that match your needs.
**5. Forgetting about mobile performance**: Many tools default to desktop tests. Always test mobile separately, as it affects most cross-border shoppers.
**6. Skipping regular monitoring**: Speed isn't a one-time fix. Monitor monthly to catch regressions from new apps or content.
- Use only one speed suite to avoid conflicts.
- Audit and remove unused apps regularly.
- Measure speed before and after tool installation.
- Test mobile speed separately.
- Schedule monthly speed checks.
Practical Recommendations and Next Steps
Based on the criteria above, here are practical recommendations for different seller scenarios.
**For small stores or beginners**: Start with Google PageSpeed Insights and Shopify's built-in speed report. Use free image compression tools like TinyPNG. If you need more, try a free tier of NitroPack (with limited features) or the Shopify app 'Crush.pics'.
**For growing stores with moderate traffic**: Consider a comprehensive suite like NitroPack or PageSpeed. These offer image optimization, caching, and CDN. Prices start around $15/month (indicative). Test the free trial to see if it improves your Core Web Vitals.
**For large stores with high traffic**: Invest in a robust solution like NitroPack Pro or a custom CDN setup with Cloudflare. Expect to pay $30–$50+ per month. Ensure you have a developer to configure advanced settings.
**Next steps**: 1) Run a speed test today. 2) Identify your main issue (images, scripts, etc.). 3) Choose a tool that addresses it. 4) Test on a staging store. 5) Implement and measure the impact. 6) Monitor monthly.
Remember, prices and policies are indicative and subject to official updates. Always check the official app store or website for current details.
- Run a speed test now.
- Identify your top 3 speed issues.
- Select a tool based on your budget and needs.
- Test on staging, then implement.
- Set a monthly reminder to re-test.
Key Takeaways
Speed optimization is not a one-time task but an ongoing process. By understanding your store's specific bottlenecks, evaluating tools based on features, price, and compatibility, and avoiding common mistakes, you can significantly improve user experience and sales. Start with a speed test, choose a tool that fits your needs, and monitor regularly. For the best results, combine a speed tool with good theme and app hygiene.
This article is compiled by kuajing168.cn for reference only. Please refer to the official announcements of each platform for the latest policies and rates.
© 版权声明
文章版权归作者所有,未经允许请勿转载。
相关文章






暂无评论...
Warning: Illegal string offset 'count' in /www/wwwroot/www.kuajing168.cn/wp-content/themes/onenavtt/inc/widgets/w.carousel.php on line 239
Warning: Illegal string offset 'imgs' in /www/wwwroot/www.kuajing168.cn/wp-content/themes/onenavtt/inc/widgets/w.carousel.php on line 240
Warning: Invalid argument supplied for foreach() in /www/wwwroot/www.kuajing168.cn/wp-content/themes/onenavtt/inc/widgets/w.carousel.php on line 243
Warning: Illegal string offset 'is_tow' in /www/wwwroot/www.kuajing168.cn/wp-content/themes/onenavtt/inc/widgets/w.carousel.php on line 264
Warning: Illegal string offset 'two' in /www/wwwroot/www.kuajing168.cn/wp-content/themes/onenavtt/inc/widgets/w.carousel.php on line 265
Warning: Illegal string offset 'is_hot' in /www/wwwroot/www.kuajing168.cn/wp-content/themes/onenavtt/inc/widgets/w.carousel.php on line 299
Warning: Illegal string offset 'hot' in /www/wwwroot/www.kuajing168.cn/wp-content/themes/onenavtt/inc/widgets/w.carousel.php on line 300
Warning: Illegal string offset 'title_ico' in /www/wwwroot/www.kuajing168.cn/wp-content/themes/onenavtt/inc/widgets/w.carousel.php on line 300
Warning: Illegal string offset 'hot' in /www/wwwroot/www.kuajing168.cn/wp-content/themes/onenavtt/inc/widgets/w.carousel.php on line 300
Warning: Illegal string offset 'title_ico' in /www/wwwroot/www.kuajing168.cn/wp-content/themes/onenavtt/inc/widgets/w.carousel.php on line 300
Warning: Illegal string offset 'hot' in /www/wwwroot/www.kuajing168.cn/wp-content/themes/onenavtt/inc/widgets/w.carousel.php on line 303
Warning: Illegal string offset 'title' in /www/wwwroot/www.kuajing168.cn/wp-content/themes/onenavtt/inc/widgets/w.carousel.php on line 303
Warning: Illegal string offset 'hot' in /www/wwwroot/www.kuajing168.cn/wp-content/themes/onenavtt/inc/widgets/w.carousel.php on line 304
Warning: Illegal string offset 'post_type' in /www/wwwroot/www.kuajing168.cn/wp-content/themes/onenavtt/inc/widgets/w.single.posts.php on line 212
Warning: Illegal string offset 'post_type' in /www/wwwroot/www.kuajing168.cn/wp-content/themes/onenavtt/inc/widgets/w.single.posts.php on line 226
Warning: Illegal string offset 'only_title' in /www/wwwroot/www.kuajing168.cn/wp-content/themes/onenavtt/inc/widgets/w.single.posts.php on line 227
Warning: Illegal string offset 'orderby' in /www/wwwroot/www.kuajing168.cn/wp-content/themes/onenavtt/inc/widgets/w.single.posts.php on line 235